


Step 1. Detecting peptides
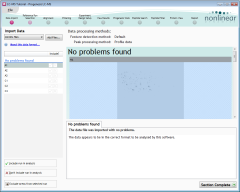 After importing the tutorial archive, the experiment opens at the Data Import
screen (shown here at the right). Progenesis LC‑MS immediately begins to load the LC‑MS runs that it contains. During this, the runs are
also examined to find any problems that might affect the reliability of your analysis. The examined runs are
shown in a list
After importing the tutorial archive, the experiment opens at the Data Import
screen (shown here at the right). Progenesis LC‑MS immediately begins to load the LC‑MS runs that it contains. During this, the runs are
also examined to find any problems that might affect the reliability of your analysis. The examined runs are
shown in a list
For this tutorial experiment, all of the runs meet the required quality standard, and we are able to move on to the next stage of analysis with no further intervention. Click the Section Complete button at the bottom-right of the screen.
Selecting a reference run
Before we can begin aligning our runs—a process that is critical to the analysis—we must choose one run that is the most representative of our data. All other runs will then be aligned to this before we detect the peptides' locations.
For this tutorial, the representative run is A1. Select it in the list and click the Use as reference run button. We can now begin aligning our runs; click Section Complete to continue to the Alignment screen.
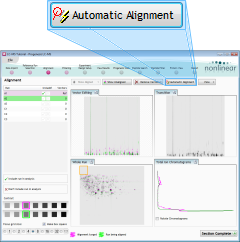 Aligning the runs
Alignment of the LC‑MS runs is required in the LC (retention time) direction. It is key to correcting for the variable elution of peptides during chromatographic separation and can be performed either manually, automatically, or by a combination of the two approaches.
For this tutorial, we'll use fully automatic alignment. It is a good idea to use this approach whenever possible, because it enhances the reproducibility of your analysis.
Click the Automatic Alignment button to align the runs to the reference. When asked which runs you want to align, leave all of the runs selected and click the OK button. The software will then begin the alignment process, which may take a few minutes.
When the automatic alignment finishes, click Section Complete. The Detection Parameters window will appear, indicating that we are ready to detect the peptides in our runs. Leave all parameters as they are and click the Detect button. The software will then spend a few minutes detecting peptides in the runs.
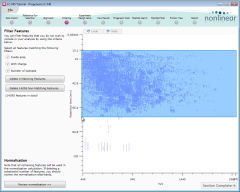 Removing unreliable features after detection
When detection finishes, the Filtering screen shows the location of the detected peptides.
We can now remove any peptides whose analysis we believe may not be reliable. This is done by specifying various peptide properties—retention time, charge, and so on—that must be matched.
First, we'll remove features with early or late retention times:
- On the image, drag out an area like that shown above (click the image for more detail). To ensure we include all peptides with a low mass/charge value (those at the left side of the screen), start the drag near the top-right and drag to the bottom-left of the main elution period.
- Click the Delete Non-Matching Features button to remove the features not inside this area.
Next, we'll restrict our analysis to peptides with a charge in the range 2 to 7 inclusive:
- Start by clicking on the Inside area option to close it.
- Click on the With charge option to expand it.
- Select Charge 2, Charge 3, Charge 4 and so on, up to and including Charge 7.
- Click on the Delete Non-Matching Features button.
This leaves us with all of the features that have a charge state between 2 and 7, and none of the features that eluted either very early or very late. We are now ready to identify the features whose behaviour varies across the runs. Click Section Complete to continue…