


How do I carry out automatic processing?
Since v2.0, Progenesis QI for proteomics includes an automatic processing facility, minimising your hands-on time and enabling you to run large experiments with a single set-up stage. This will allow you to automate the following analysis stages (even including setting the automation up while your runs are importing):
- Select an alignment reference
- Carry out automatic alignment to that reference
- Perform automatic peak picking for peptide ion detection
- Define an experiment design
- Carry out peptide and protein identification automatically (for MSE data only, as DDA data will require external database searching)
- Choose a protein quantitation method to be applied for abundance analysis
To carry out automatic analysis, select Start automatic processing at the Import Data stage.
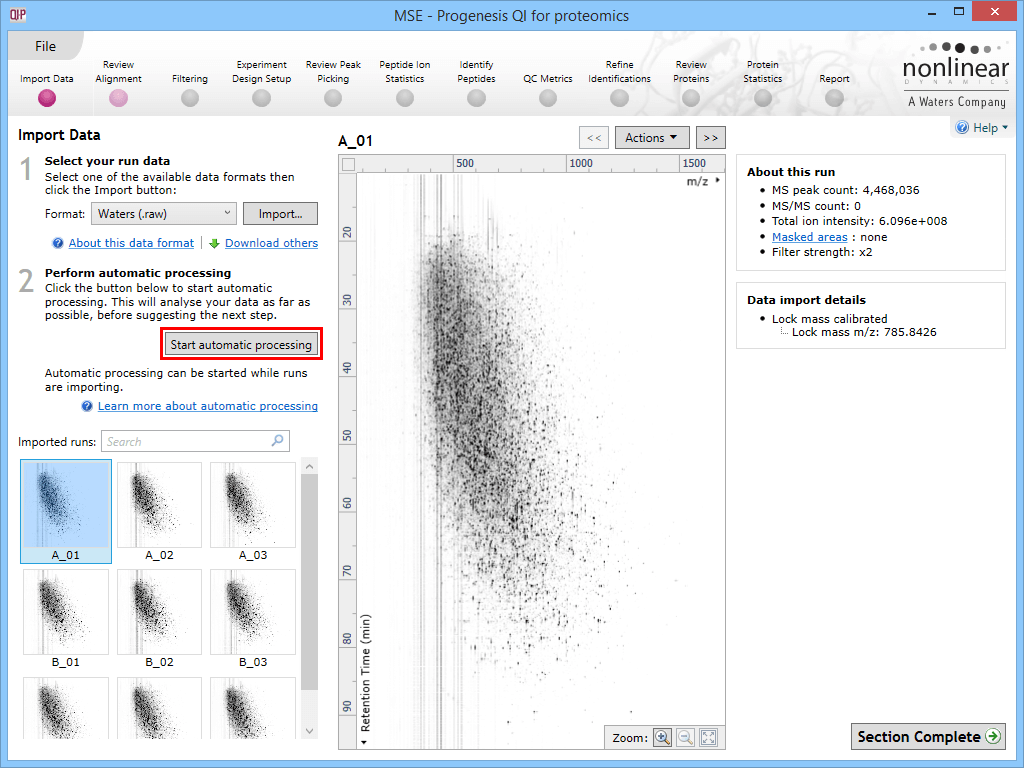
The Start automatic processing selection button at the Import Data stage.
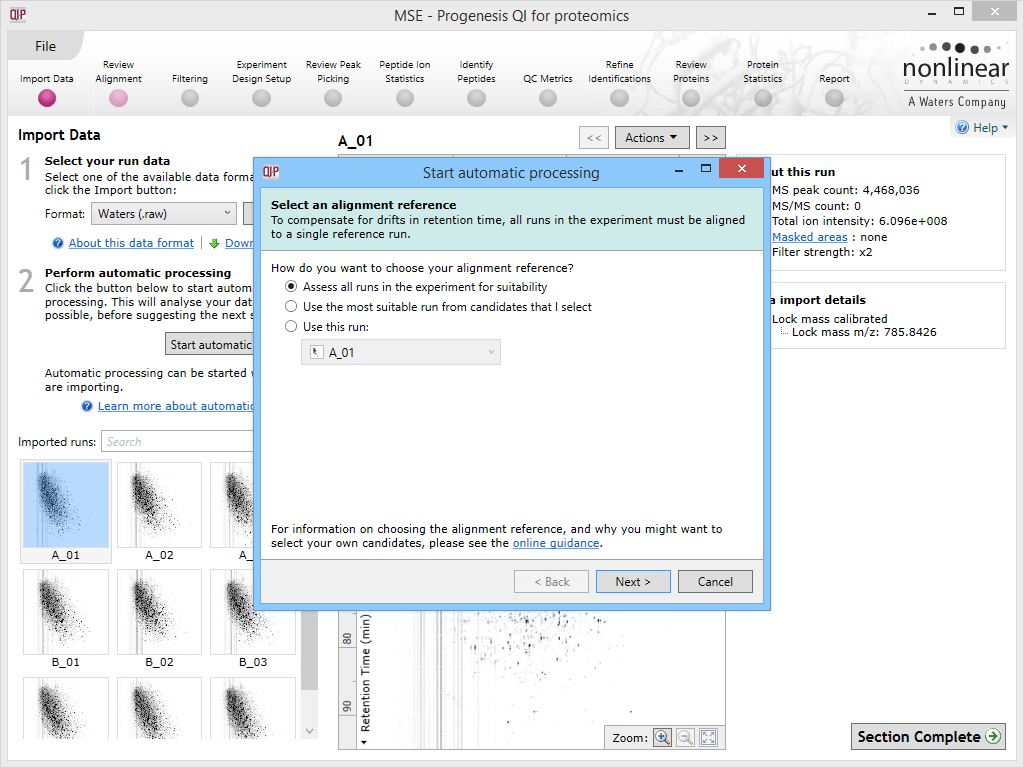
The first dialog box that appears when you launch automatic processing via the Start automatic processing button.
You are then taken through a series of dialog boxes which allow you to set up and launch the analysis. The options in the majority of these screens are actually the same as those available in the relevant sections of the workflow, and are also described in more detail in the existing linked FAQs.
Select an alignment reference
This dialog specifies which run is to be used as a refence run for alignment. Once imported, the most suitable run can be automatically determined from all or a selection of runs. Alternatively, you can specify an individual run up front. Determine the best option for your data based on our online guidance.
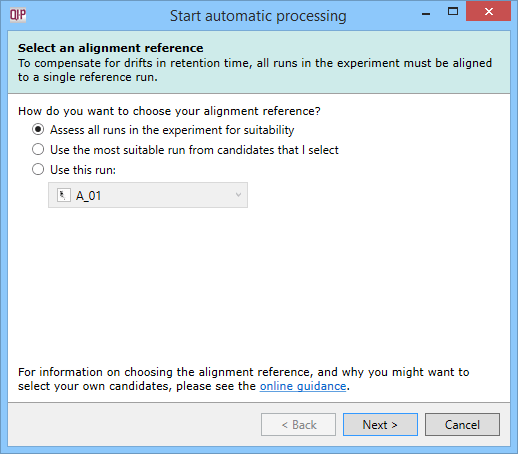
The Select an alignment reference dialog, the first stage of automatic analysis setup.
Automatic alignment
Having selected an alignment reference at the previous step, you can now opt to perform auto-alignment as part of the automatic processing of data. If you choose not to automatically align your runs, no further automatic processing can be performed.
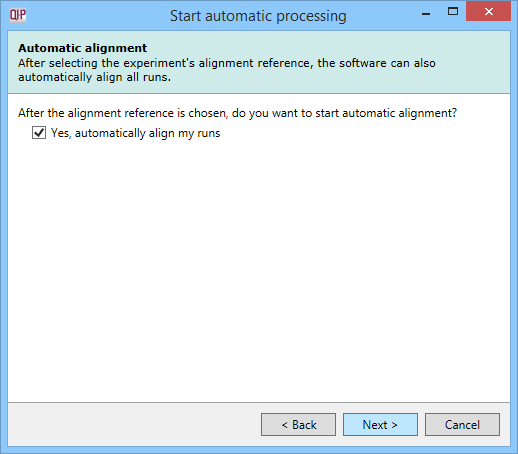
The Automatic alignment selection dialog.
Peak picking
This dialog allows you to select whether to carry out peptide ion detection as part of the automatic processing. You can also customise the peptide ion detection (as is done in the normal workflow following alignment) using the Set parameters button. You can select the runs used in picking at the Runs for peak picking tab, customise the detection parameters as desired at the Peak picking limits tab, and / or exclude retention time regions of the profile at the Retention time limits tab. You can also limit the maximum allowable charge state for peptide ions using the Maximum charge tab.
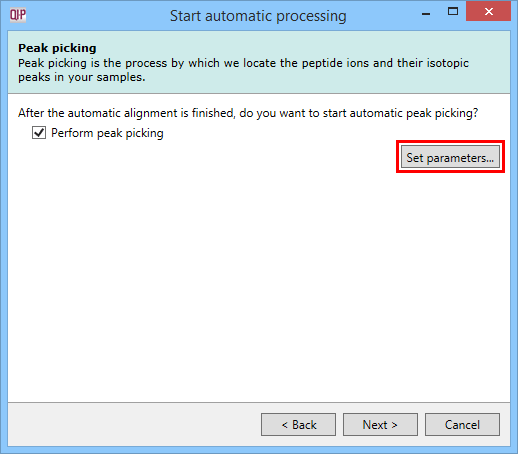
The peak picking dialog with the Set parameters button highlighted.
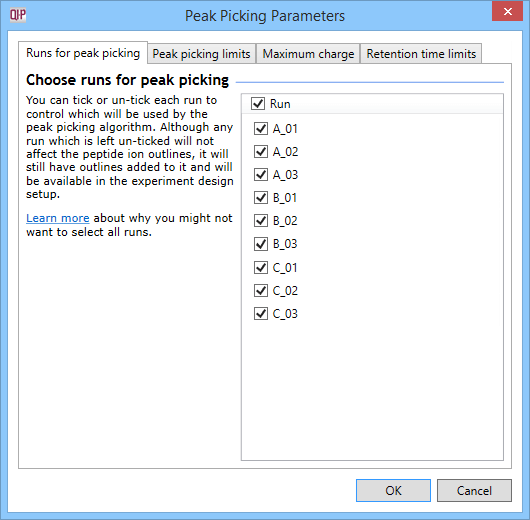
The Peak Picking Parameters accessed using the Set parameters button, as described in the text.
Experiment design
In this dialog, you can import an existing experiment design to speed up the comparison of your quantitated samples. The process is explained here, and requires a pre-made file containing your design as a table with the grouping conditions as columns and the samples as rows.
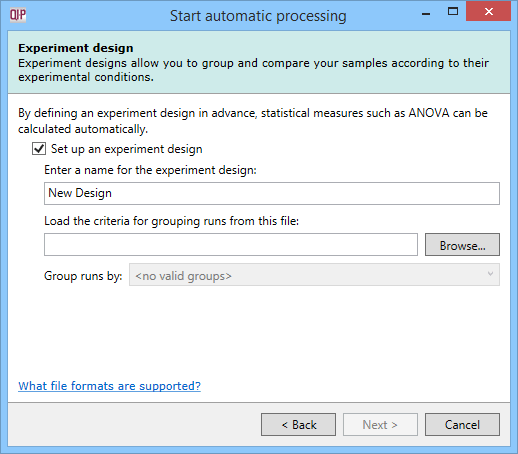
The Experiment design dialog.
Once a suitable file is loaded, you will be able to select from the grouping variables present in your table as to which provides the initial experiment design. This can be achieved using the drop-down provided in the dialog, as shown below.
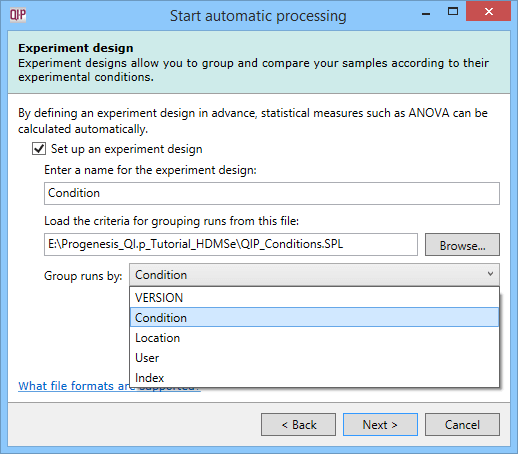
A successfully loaded .spl file allowing selection of the initial experimental design from all the grouping variables present within the file.
Identify peptides
For MSE data, it is possible to carry out identification as part of the automatic processing. It is also possible to customise your identification parameters, just as you can in the normal workflow, by using the Set parameters button. This stage in the automatic processing is not available for DDA data and is omitted – such data require export to external databases for identification purposes.
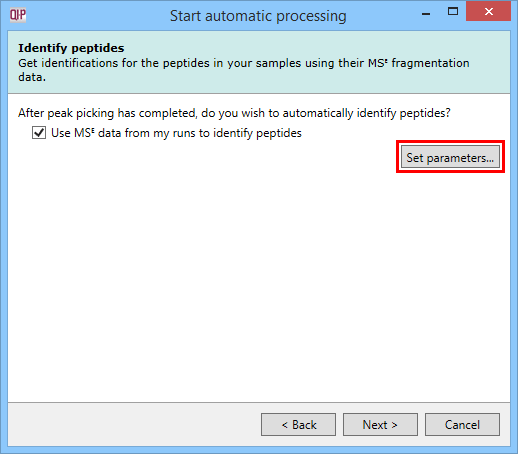
The Identify peptides dialog allowing MSE identification to be carried out as part of the automatic processing, with the Set parameters button highlighted.
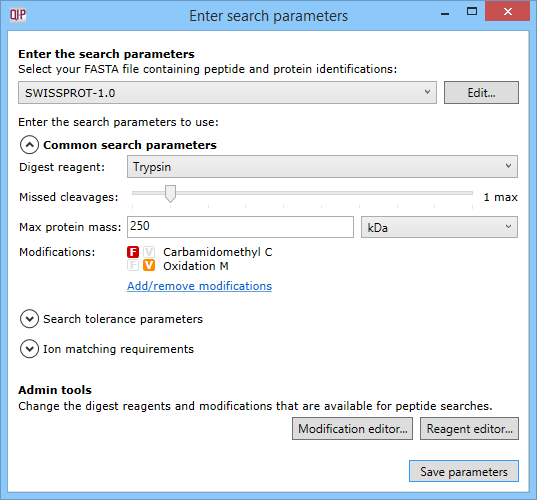
The dialog accessed using the Set parameters button, where search parameters can be customised.
Protein quantitation
The method used to quantitate your data can also be set in the automatic processing workflow. In the main workflow, this is set using the Protein Options dialog at the Resolve Conflicts or Review Proteins windows once identification data are available. In the automatic processing set-up, this is chosen prospectively. It will be applied to your identified proteins; if proteins are not automatically identified (for DDA data, for example) it will be automatically set 'ready' for such results.
The options are to quantitate relatively (using unique peptides, all peptides, or Hi-N) or to quantitate absolutely using Hi-N. Protein grouping can also be enabled if desired.
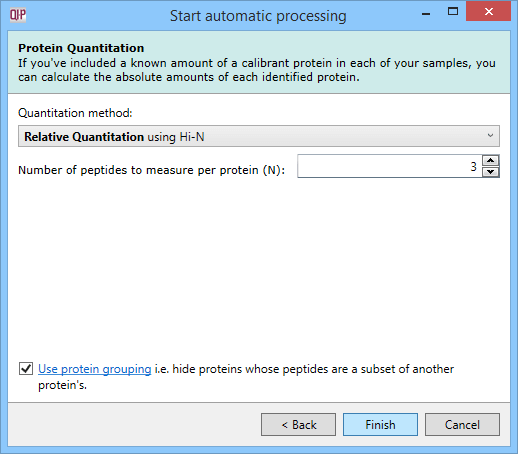
The Protein Quantitation dialog.
This is the final selection dialog; after this, selecting Finish will begin the analysis.
Progress and completion
The automatic processing workflow will provide an ongoing progress report once running, ticking each item as it is completed with summary comments and updating on percentage completion of the whole process.
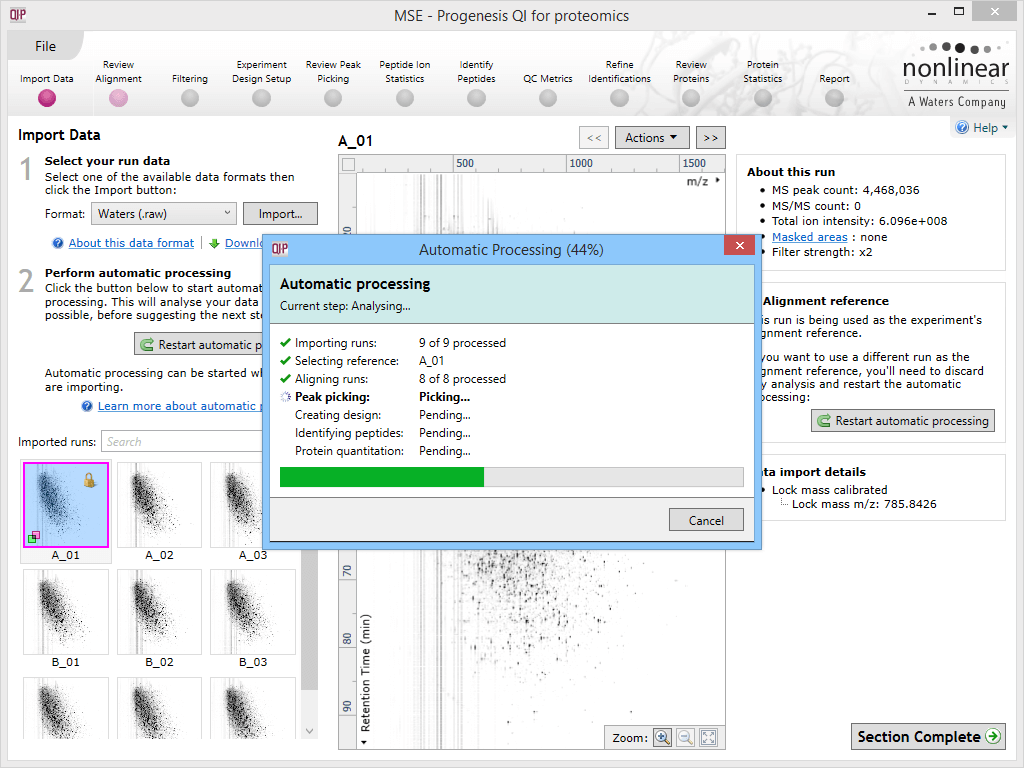
The automatic processing status dialog, showing progress of the analysis.
Once the process is complete, the dialog offers the option to either jump to the QC Metrics stage to review your results (the bottom-right button) or to the first relevant missing stage as appropriate – for example, for DDA data that has been imported, aligned, peak-detected and has an experimental design in place, the suggested exit stage is Identify Peptides to carry out the missing stage. The drop-off point offered to you will be as follows depending on the last successfully completed stage:
- Ref selection -> Review Alignment
- Alignment -> Review Alignment
- Peak Picking -> Experiment Design Setup
- Experiment Design -> Identify Peptides
- MSE Search -> QC Metrics
The quantitation method selection does not affect the drop-off point, but merely applies that option everywhere relevant in the workflow for you.
The alternative option offered is to close the dialog, which will not move you to a later stage, and instead navigate through all the stages yourself. Naturally, you may jump from stage to stage at any time, regardless of the option chosen.
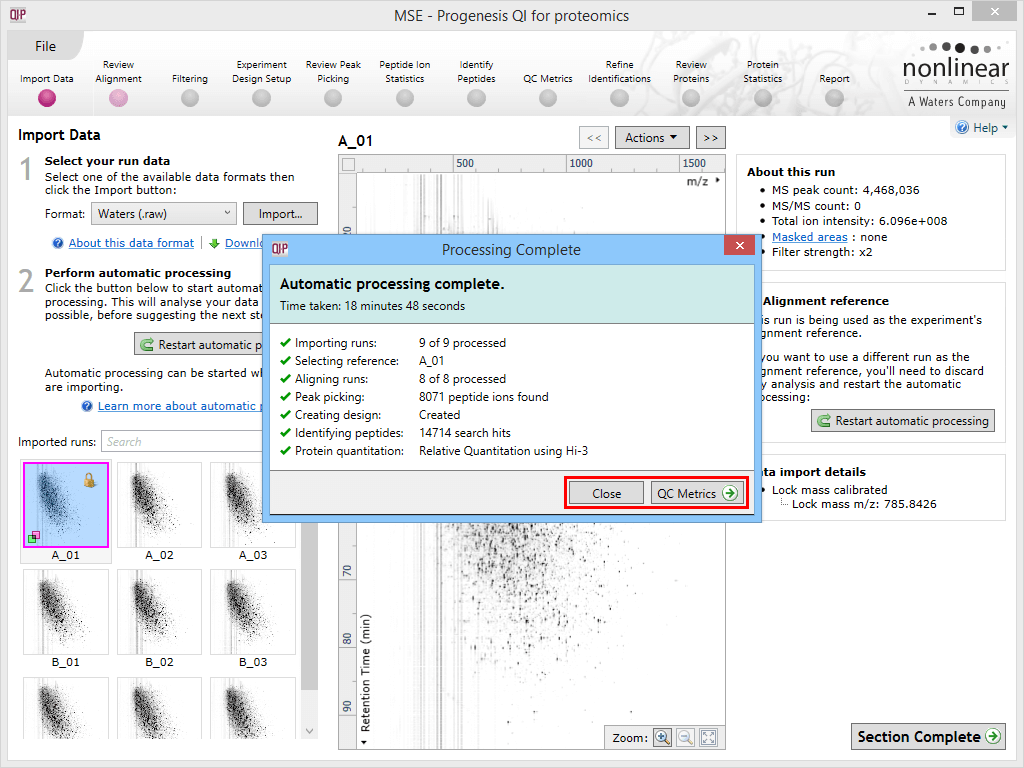
The automatic processing status dialog reporting a completed analysis. The selection in this case may be made to move to QC Metrics or close the dialog and review each stage in turn; the relevant buttons are highlighted by the red box.
Processing failures
If a stage fails to complete successfully or only partially completes, the automatic processing dialog will warn you of the problem. This may or may not allow the automatic processing to complete.
For example, a run that fails to automatically align will trigger a warning, although analysis will continue. That run will not contribute to the peak picking and will be excluded at the alignment stage, but can be added back in at the Review Alignment stage if desired once alignment has been corrected.
As another example, runs that import successfully, but with warnings, will be identified to notify you of the potential quality issue. They can be investigated on the Import Data screen. If some runs fail to import (but not all), the automatic processing will likewise continue.
An example of a problem that would halt the automatic processing would be the failure to successfully import all the potential reference candidates (for example, where in importing, you specified selection of the alignment reference from several runs before they were fully imported and set the processing underway, and they later failed to import owing to problems with the runs).